Idea
Installation manual
Last updating 28th of August 2025
INTRO
Idea is a wireless touch keypad that allows managing the D’AVINCI system. It is designed for use in internal and external non-burdensome environments, it allows you to perform operations such as arming/disarming, commands and scenarios. Through the indicator light, it provides guidance on the status of the installation.
The keypad manages security modes using access codes, cards or key rings equipped with a 125kHz transponder.
Idea supports the function of «silent alarm» when entering a coercion code.
OPERATION
Idea works within the D’AVINCI system with a range up to 1000 meters (in free space) connecting, via radio, directly to the Control Panel Lisa or via Automa repeater. The communication is bidirectional type (transmission/reception) with the indication of confirmation of receipt and command.
In case of obstacles such as walls, objects, etc. the range rate is reduced.
The communication protocol, like the connections between all system components, is GENIO, cryptographic type and protected from interceptions.
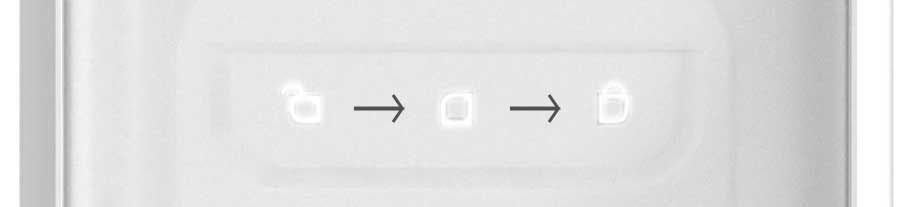
The keypad is capable of:
- arm control panel (or system) – by pressing the button;
- arm the control panel (or system) into Stay mode– by pressing the button;
- disarm the control panel (or system) – by pressing the button;
- activate an alarm/rescue, actuator or scenario – by pressing the button
You can control security and home automation functions with the keypad Idea using:
- Codes: The keypad supports general codes or personal codes for users registered with the D’AVINCI system.
- Cards or keychains: It can connect Tag keychains and ISO cards at 125 kHz equipped with encryption.
DEVICE CONFIGURATION IN THE D’AVINCI SYSTEM
- Install the app D’AVINCI, available for iOS / Android, on your smartphone.
- Create a account . Add a D’AVINCI control panel, save the necessary settings and create at least a room.
- Make sure the Control Panel is turned on and has Internet access via Ethernet.
- Make sure that the Control Panel is off and not running updates by checking its status via the mobile application.
To add a device to the control panel, in the D’AVINCI app 1
- Select the Tab Device 2

- Click on Add Device

- Name the device
- Insert the serial number of the device shown on the label or click on icon
 to scan the code via the app
 - Select the associated Room for the device
- Click on Add – a countdown will start
- Remove the tab from the battery, so as to Power the device (see installation phase of the device).
The detector led will emit a flashing light when it is switched on.
When paired with the control panel, the detector will appear in the list of devices in the D’AVINCI App .
Subsequently it will be necessary to close the tamper, positioning the keyboard on your bracket, to allow you to carry out the calibration phase of the touch part of the keyboard.
The connection request to the Control Panel is transmitted for a short period of time as soon as the device is switched on.
If the connection to the D’AVINCI control panel fails, turn off the detector for 5 seconds and repeat the procedure.
1 Installer privileges are required.
2 To start the configuration procedure, the device must be within the radio communication zone of the associated Control Panel.
KEYPAD INSTALLATION
Make sure you have selected the ideal installation location based on the guidelines contained in this manual.
The place of installation of the keyboard influences the connection with the control panel and any obstacles between the devices can block the transmission of the radio signal. Such obstacles can be walls, floors or large objects.
To install the keypad:

Turn on the keypad by pressing the On/Off button for four seconds on the back. The keyboard will automatically transmit the radio synchronization signal with the control panel (*).
Attention! When the keypad is mounted on the wall mount the On/Off button is no longer accessible.

Attach the bracket to the wall through the four screws supplied, screw in making sure not to deform the bracket.
Attention! The deformation of the bracket compromises the correct functioning of the anti-tamper tamper.

- Near metal objects or mirrors that may attenuate or block the radio signal.
- Next to other radio devices (gsm/wireless router/etc.) to avoid mutual interference
- In environments where temperature or humidity values may exceed the limits specified in the Technical Specifications.
FUNCTIONS
The idea keypad supports the following types of codes.
– Login Keypad Code: set for users not registered in the system. If used, events generated by that code will be marked with the associated name.
– User code: personal code of users connected to the control panel. When used, events are sent to the D’AVINCI app with the user name.
* Before entering a code or using Tag/Pass, you should activate « awaken» the keypad by moving your hand or card closer to the approach sensor. When Idea is activated, button backlighting is enabled and the keyboard beeps (if acoustic indication is enabled during programming).
Keypresses are accompanied by a sound signal. Within the settings, light and acoustic signals can be adjusted.
Function key
Idea has a pulsed function that operates in the following modes:
- None: pulsing is disabled.
- Command activation: allows you to activate a command.
- Scenario activation: allows you to activate a scenario.
- Antipanic: allows you to activate a rescue alarm (e.g. robbery).
Coercion code
Idea supports the coercion code. Allows you to simulate disarming the system. If engaged, the sirens associated with the system will not signal the alarm, while other users of the system and possibly the supervisory institution connected to the exchange will be warned.
operating settings
Keypad settings can be changed in the D’AVINCI app (Installer privileges required):
- Go to device tab

- Select the device from the list.
- Go to settings by clicking on the icon

DEVICE NAME
Keybpad name, displayed in the devices list and as notification text. It can contain up to 24 characters.
ROOM
Selecting the virtual room to which the device is assigned displays the name of the environment in notifications.
NB: Changing this parameter requires Administrator privileges.
AREAS
Select the areas associated and managed by the device.
ENABLE RFID TAG READER
When enabled, it allows you to perform security/home automation operations through the use of RFID Cards/Tags. [Enable/Disable].
INSERTED STATUS INDICATOR
When enabled, allows system state to be displayed even in stand-by condition. [Enable/Disable].
AUTOMATIC LOCK UNAUTHORIZED ACCESS
If enabled, the keypad is locked for the preset time if an incorrect code is entered or invalid cards/tags are used more than three times in a row in 1 minute. [Enable/Disable].
It is not possible to perform keypad operations at this stage. It is possible, however, to unlock the keyboard through the D’Avinci App. [Enable /Disable].
AUTOMATIC LOCK TIME
Keypad lock period after incorrect code entry attempts [1, 3, 5, 10, 20, 30, 60, 90, 180] minutes.
NUMBER OF UNAUTHORIZED ACCESS ATTEMPTS
Number of login attempts, with invalid code entry or card/tag pass, resulting in a keypad hang [ 3-10].
VERIFICATION INTERVAL UNAUTHORIZED ACCESS ATTEMPTS
Time interval, within which, unauthorized access must fall in order to determine a keypad block. [1, 3, 5, 10, 20, 30, 60, 90, 180] minutes.
ACOUSTIC LEVEL KEYPAD
Selection of the volume level of the keypad pulsates, when pressed, and of the acoustic signals. [Disabled/Normal].
ACTIVATE SIREN ON TAMPER
It allows you to activate the siren if the keyboard is in the tamper state (anti-opening or anti-tampering tamper open). [Enable /Disable].
REPEATER USE
It allows you to enable the detector to be connected to the system, via a repeater, e.g. Automa.
– Repeater number: indicates the number to which the detector is associated.
CHECK RADIO CONNECTION
It allows you to enable alarm signaling in case of failure to communicate with the control panel. If disabled, the report of failure to connect to the exchange will be archived exclusively.
PING INTERVAL
Time interval, expressed in seconds, between one survival transmission and the next in the absence of activation
[ 12 ÷ 600 ] seconds.
NUMBER OF EXPECTED PINGS
Number of connection attempts before radio communication failure report.
[ 1 ÷ 15 ].
RADIO SIGNAL INTENSITY TEST
With this function, the device, after pressing the START button, processes a test where it will indicate the signal level, flashing n times depending on the result obtained (1-4).
Attention: to view the radio signal level you need to wait for «survival». Alternatively you can «wake up» the keypad.
EXCLUDE DEVICE
It allows you to disable the headboard without removing it from the system.
– No: the device operates normally and transmits all events/alarms.
– Total: the device does not execute sent commands. The system ignores device alerts and related notifications.
– Tamper only: the system ignores notifications about the device tamper button (tamper) being activated.
REMOVE DEVICE
Dissociate the keypad from the Control Panel, removing it from the app and deleting the device settings.
INTENSITY GENIO SIGNAL
To display the signal strength select the card Devices ![]() and the signal level field GENIO
and the signal level field GENIO
0 = No radio signal, no connection to control panel.
• = Poor radio signal, unstable connection with the Control Panel , operation of the detector not guaranteed.
• • = Low radio signal, low signal strength.
• • • = Good radio signal, good signal strength.
• • • • = Excellent radio signal, optimal signal strength.
Check the radio signal strength before the final installation of the device. In case of low or unstable signal it is recommended to use the Automa repeater.
KEYPAD STATUS
The status shows information and operating parameters of the device.
To display status:
- Access the D’AVINCI application
- Select the Central on which the keypad is associated
- Go to Devices tab
- Select keypad
| Icon | Description | Note |
 |
Connection status | - Online: connection established with the control panel
- Offline: connection error with the control panel |
 |
Genio signal level | - 0
- 1 - 2 - 3 - 4 |
 |
Battery Level | Regular
Low |
 |
Tamper status | - Regular
- Alarm |
 |
Device exclusion status | - No
- Total - Lid only |
 |
Areas | - None
- Area name associated |
 |
Repeater use | - No
- Yes (1-5) |
REPLACING BATTERIES
The keyPAD periodically checks the status of the batteries and communicates to the control panel when they are running out. Battery life depends on the number of functions performed, such as insertions/disconnections, commands, and the programming performed.
If the control panel indicates the low battery status, replacement must be carried out quickly.
To replace the batteries, remove the keypad from the wall fixing bracket after unscrewing the locking screw.

Unscrew the 4 bottom screws and remove the lid.

Replace the four AA Lithium batteries and close the lid with the four screws.
Warning! Recycling of integrated batteries
Integrated batteries can only be removed by qualified personnel. Make sure the batteries are empty before removing them. For disposal, refer to the instructions contained in this manual.
DISPOSAL BATTERIES
This symbol, placed on electrical and electronic devices and on the accompanying documentation, indicates that these products cannot be eliminated like common household waste.
The products must be delivered to specially equipped collection centers, which provide free disposal, processing, recovery and recycling of materials.
The proper disposal of this product helps to safeguard human health and the environment, avoiding waste of natural resources and the dispersion of toxic pollutants into the soil, air and water. Contact the offices of your municipality of residence to find out the nearest collection center. Violation of legal obligations regarding waste disposal is punishable by administrative or criminal sanctions.
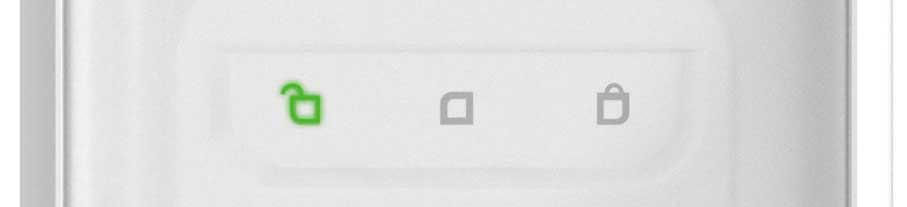
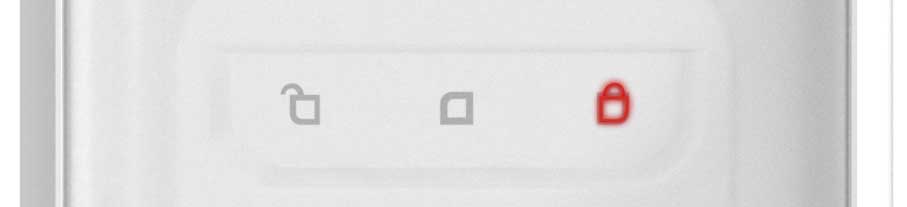
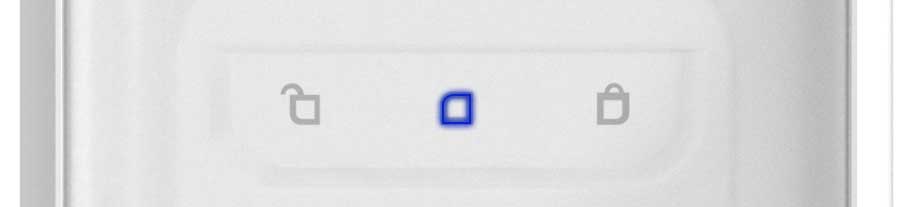
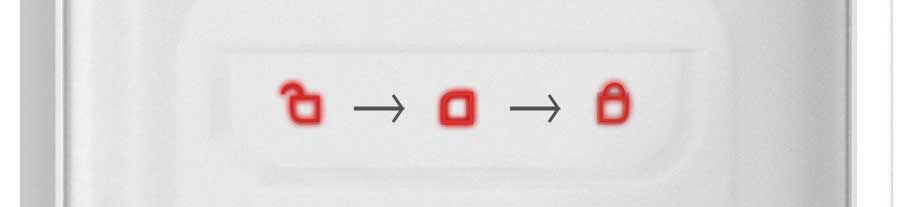
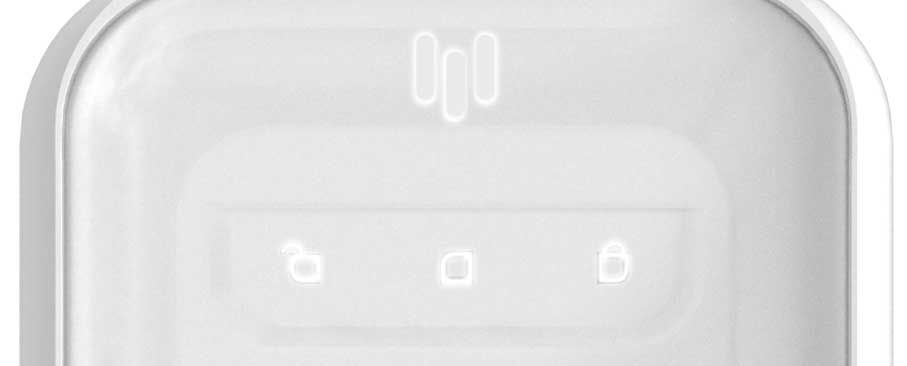
LIGHT INDICATIONS
The keypad Idea can report the status of the D’AVINCI system via the indication LED and the built-in buzzer. System status is indicated by function keys (Arm / Stay / Disarm) as a result of keyboard activation. In addition, the keypad can provide an indication of the system status even in sta
| FUNCTIONAL ELEMENT | INDICATION | DESCRIPTION |
| Status indication |
 |
System disarmed |
 |
System armed | |
 |
System inserted in Stay mode | |
| Function keys |
 |
System disarmed |
 |
System armed | |
 |
System inserted in Stay mode | |
 |
No radio connection | |
 |
Keypad locked | |
| Status indication + Functions keys |
 |
Activation-association card/tag RFID |
TECHINICAL SPECIFICATIONS
| Device Type | Wireless touch keypad |
| Max number of installable radio keypads | 20 |
| Tag reader | Trasponder 125 kHz |
| Anti-sabotage protection | - antijammer
-Tamper proof: anti-tear, anti-opening |
| Power supply | 4 batteries AA Li-ion – 1.5V |
| Radio communication protocol | Genio |
| Operating frequencies | 868.20 - 868.95 MHz 921.20 - 921.60 MHz |
| Battery Life | Up to 2 years, 6 RFID Tag operations per day or 20 Pin operations per day (in factory conditions) |
| Container | ABS UV resistant |
| Radio signal range | 1000 m in free space |
| Installation | Indoor/Outdoor |
| Protection class | IP53 |
| Impact resistance | IK 07 |
| Dimensions | 110 X 160 X 28 mm |
| Compliance with safety standard | Grade 2, environmental class III in accordance with the requirements of standard 50131-3 |